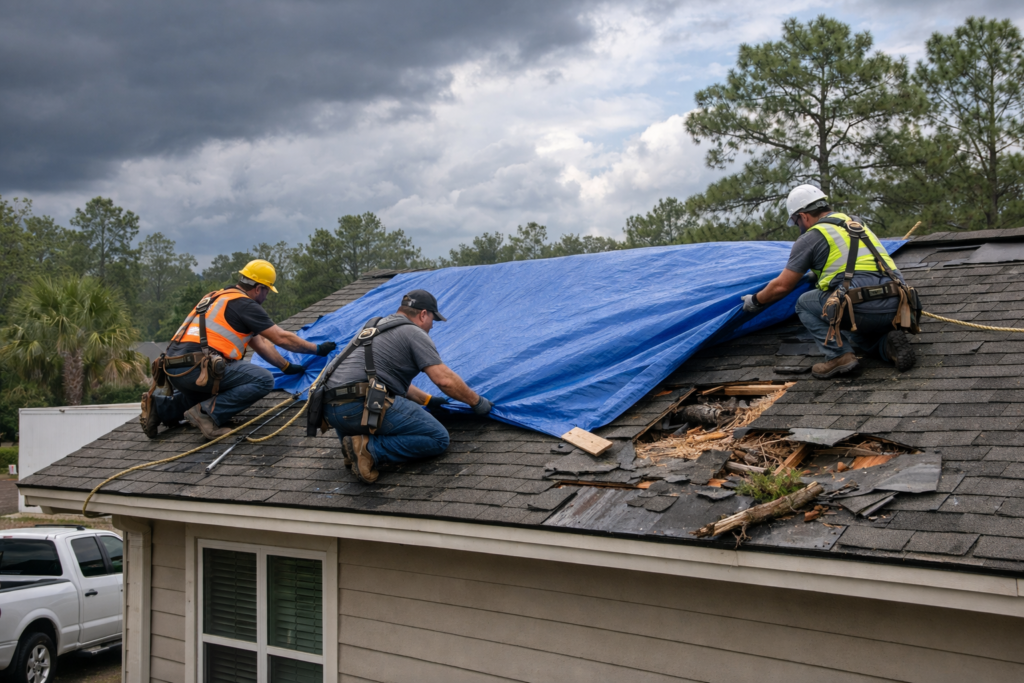
When severe storms, heavy wind uplift, or falling tree branches breach your home’s exterior envelope, immediate emergency response is critical to prevent cascading water damage. While waiting for professional assistance from Edison Emergency Roofers, securing a heavy-duty waterproof tarp over compromised sections serves as an essential temporary shield. However, scaling a damaged roof involves serious safety risks, heights, and unstable structures that require extreme caution.
Visit Edison California Roofing Inc :https://share.google/fOhIM9UpSq5mE4OUu
This guide outlines a methodical, beginner-friendly process for temporarily securing a damaged roof section while minimizing personal injury and further structural harm.
Safety First: Essential Precautions
Before gathering materials or setting up ladders, prioritize your personal safety above all else. Roofing work following a storm presents severe fall hazards, electrical risks, and structural instability.
- Never Roof in Active Storms: Wait until rain, high winds, and lightning stop completely before attempting any roof access.
- Inspect for Structural Integrity: If rafters are sagging or ceiling joists are cracked, stay off the roof entirely and call professionals immediately.
- Watch for Power Lines: Look up and locate nearby utility wires before raising or positioning extension ladders.
- Wear Proper Footwear: Always wear soft-soled, slip-resistant shoes or boots to maintain traction on asphalt or tile surfaces.
Materials and Tools Needed
Gather all necessary supplies on the ground before climbing up to ensure efficient workflow and avoid multiple trips up and down the ladder.
| Material / Tool | Purpose & Specification |
| Heavy-Duty Poly Tarp | Thick UV-resistant polyethylene tarp large enough to cover the damaged area plus a 2-foot overlap. |
| Wood Furring Strips | 2×4 wooden boards or 1×3 furring laths to anchor the tarp edges securely against wind uplift. |
| Roofing Nails or Screws | 2-inch roofing nails or corrosion-resistant deck screws to fasten the wood strips. |
| Utility Knife & Hammer | For cutting tarp material and driving fasteners securely into roof decking. |
| Extension Ladder | Sturdy ladder rated for your weight, extending at least 3 feet above the roof edge. |
Step-by-Step Guide to Tarping a Damaged Roof
Follow this step-by-step sequence carefully to install a temporary weather seal without causing further damage to your shingles.
1.Clear Debris and Assess the Damage:Preparation.
Safely remove broken shingle pieces, loose tile fragments, and jagged debris from around the hole using gloved hands. Sweep the surrounding area clean so the tarp sits flat against sound decking.
- Verification: Confirm the damaged area is fully cleared of loose shards and sharp objects that could puncture your waterproof tarp.
2.Measure and Position the Tarp:Placement.
Unroll your heavy-duty tarp on the ground and measure it against the damaged zone, ensuring at least a 2-foot overhang past the top and sides of the breach. Carry the folded tarp up your secured ladder.
- Verification: Verify that the top edge of the tarp extends well past the peak ridge line (if applicable) to prevent water from running underneath the top hem.
3.Secure the Top Edge Underneath Existing Shingles:Anchoring Top.
If possible, slide the top edge of the tarp at least 2 feet underneath the intact rows of shingles sitting above the damage. This ensures rainwater flows naturally over the tarp rather than under it.
- Verification: Gently tug upward on the top edge to confirm it is firmly trapped beneath intact shingle courses.
4.Nail Through Wooden Furring Strips:Securing Perimeter.
Lay a 2×4 wood board or furring strip across the top edge of the tarp. Drive roofing nails or screws directly through the wood, tarp, and shingles into the solid roof decking below. Repeat this process along the side and bottom borders.
- Verification: Pull firmly on the tarp edges to ensure the wooden strips hold the material taut against high winds without tearing.
5.Final Weatherproofing Inspection:Completion.
Inspect all edges to ensure there are no loose flaps or exposed gaps where wind-driven rain can enter.
- Verification: Check that water poured near the upper boundary flows completely over the tarp without pooling underneath.
Warning: Walking on wet, storm-damaged, or steep tile roofs is extremely hazardous. If your roof pitch exceeds a 6:12 slope, or if you feel uncomfortable at heights, skip DIY tarping and contact emergency local contractors right away.
Summary Checklist for Emergency Roof Tarping
Keep these core principles in mind during emergency response:
- Prioritize Safety: Never climb onto a wet roof during active weather or structural compromise.
- Provide Adequate Overlap: Ensure the tarp extends at least 2 feet beyond all sides of the hole.
- Anchor with Wood Strips: Always sandwich the tarp between wooden furring boards and the roof deck to prevent wind tearing.
- Call Professionals: Schedule a permanent repair estimate with qualified regional experts as soon as weather conditions clear.